Turtle Nests
The life of a turtle is full of dangers even before they leave the nest. After female turtles lay their eggs in late spring or early summer, turtle eggs may take 60–90 days to hatch and some hatchlings may even spend their first winter in the nest. During this time, they are vulnerable to predators such as raccoons, foxes, and minks that often dig up nests and eat the eggs or hatchlings inside. In fact, it is estimated that less than 1% of turtle eggs will hatch and survive until adulthood. When combined with the many human-related threats facing turtles in Ontario, this can have devastating effects on turtle populations.
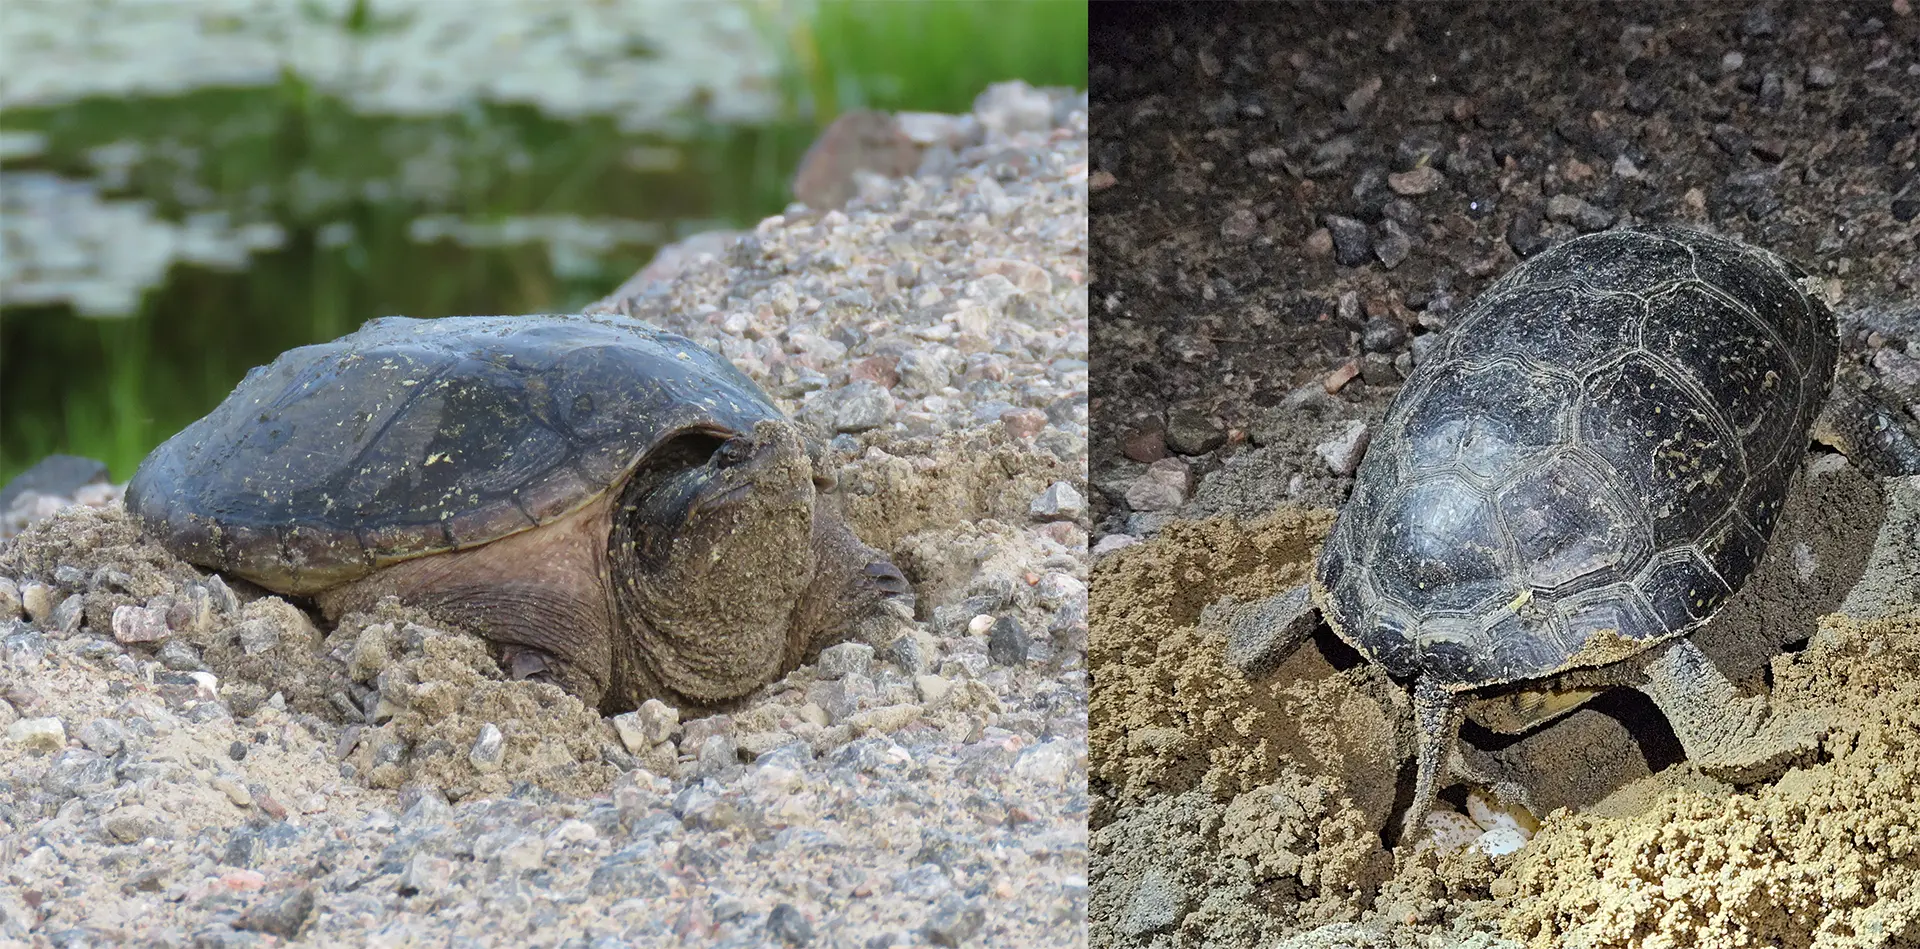
Photo: Blanding’s turtle and common snapping turtle observed nesting.
Turtle Nest Protectors
You can help protect turtle eggs and hatchlings from predation by installing a nest protector. These prevent predators from digging up nests while still allowing hatchlings to leave the nest when they are ready.
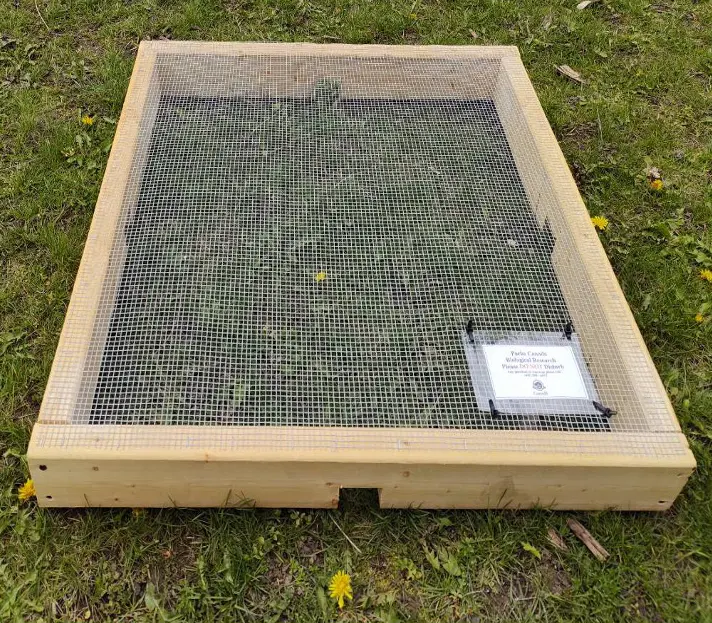
Building a Nest Protector
Materials:
8’ x 4” x 2” wooden board
3” nails x 8
2’ x 2’ piece of hardware cloth (wire mesh)
U-shaped hardware tracks x 8
8” garden spikes x 4
Washers (of appropriate size for garden spikes) x 4
Stake flag (optional)
Hammer and saw
Instructions:
Step 1: Cut the wooden boards into four 2’ lengths.
Step 2: Saw notches approximately 1” tall and 2” wide into two of the wooden boards. This will allow hatchlings to get out from under the nest protector and exit the nest when they are ready.
Step 3: Select one notched and one non-notched board. Nail these pieces together at a 90° angle such that the boards ‘stand’ on their 2” sides. Repeat with the other notched and non-notched pieces to get two L-shaped pieces.
Step 4: Ensure that the notches on both L-shaped sections face the same way (the bottom of the nest protector) and nail the pieces together to create a square frame.
Step 5: Lay the wire mesh over the top surface of the frame and secure it by hammering hardware tracks into the top of the finished square every 4–6 inches. Make sure it is pulled tight with no gaps between the mesh and frame to prevent predators from reaching into the nest.
Step 6: Insert the garden spikes (with washers attached) into holes in the hardware cloth near each corner of the frame.
Installing a Nest Protector:
If the turtle nest is not on your own property, you will need permission from the landowner to place the nest protector. Do not install nest protectors on public property.
Step 1: Look for nesting females in areas with loose soil or gravel such as road shoulders and shorelines. Peak nesting times are evenings from late May to early July.
Step 2: When you see a nesting turtle, approach carefully and use a stake flag or other object to mark the location of the nest. Then, retreat and give the nesting turtle space.
Step 3: Return to the nest after the female has left (this may take several hours) and carefully place your protector over the nest such that the centres of both are aligned.
Step 4: Secure the nest protector to the ground by pushing the garden spikes at each corner into the ground. Ensure that the spikes do not disturb the nest itself.
Step 5: Remove any vegetation obstructing the notched exit holes and ensure that the top of the nest protector has full access to sunlight.
Step 6 (optional): Place the stake flag to mark the location of the nest protector so it can be left undisturbed during nearby activities such as lawn maintenance.
Step 7: Check on the nest in late October. If there are signs that the hatchlings have left the nest (i.e. an exit hole in the middle of the protector), you can remove the nest protector. If there are no signs that the hatchlings have left the nest, leave the nest protector until spring as some hatchlings may overwinter in the nest.
DO NOT disturb a nest or remove its contents from the wild. This can seriously harm the eggs or hatchlings and is illegal in Ontario.
If you are concerned about a turtle nest you have found, either on your own property or elsewhere, there are many organizations you can contact for help. Find a list at the Ontario Turtle Conservation Network.
Creating Nesting Sites
Additionally, you can also create turtle nesting habitat on your property to help offset the loss of suitable nesting sites. Keep in mind the following characteristics of preferred nesting sites:
- South, southwest-facing orientation for maximum sun exposure
- Moist, well-drained substrate that is not too wet (to prevent eggs from drowning and mold formation) and not too dry (to ensure eggs have adequate water supply)
- Loose soil (sand or gravel) allowing for air circulation and digging
- Minimal vegetation cover on the nest itself. You may need to trim vegetation as it grows or place a landscape filter cloth well below nesting depth (below 12”) to prevent growth.
- Nearby ground vegetation to protect emerged hatchlings
Avoid creating sites near linear landscape features such as roads and animal paths to avoid the risk to hatchlings from road mortality and predation. Consider constructing multiple sites at different locations and using different substrates to provide nesting turtles with many options and account for variation in preferences due to climatic conditions. This can also provide microclimate variation and avoid too many predators at one site.
Once a turtle has nested on your site, you can install a nest protector to prevent predation.
Note that turtles often return to previously used sites in subsequent nesting seasons and may avoid otherwise suitable nesting habitat as long as their previous sites remain, so it may take several years for females to select your nesting site.
Additional Resources
You can also learn more about protecting turtle nests here: